Smarthome | Apr 22, 2020
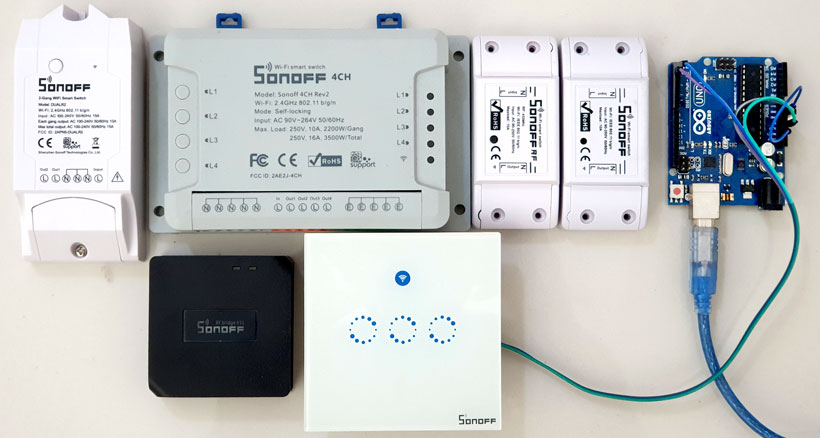
Arduino UNO can be used to install a custom firmware on a Sonoff device when a FTDI converter is not available.
Warning: Sonoff devices are not toys. They do operate in AC high voltage. Do not connect Sonoff devices to AC current during the flashing.
Arduino UNO is one of the most commonly available Arduino type of a programming board which is cheap and very easy to find in anywhere in the world. In this case, for flashing Sonoff devices with a custom firmware, an Arduino board can be configured to work as a FTDI converter in case a real 3.3V FTDI converter is not available.
Sonoff is brand name of a Chinese IOT device manufacturer ITEAD. Sonoff devices are small ligh-weight, cheap and durable IOT devices mostly using ESP8266 chip with in-built Wi-Fi. They can be connected to AC (110V – 240V) out of the box and very reliable. Sonoff devices come with a pre-installed firmware by ITEAD which helps to connect to eWeLink (free cloud service maintained by ITEAD for Sonoff devices to control remotely). In most cases Sonoff users flash this firmware with a custom firmware (Ex: Tasmota) to gain more features, control and security.
Remember that Arduino UNO have both 3.3V and 5V GPIOs. But the outputs are 5V. Therefore, during the flashing the RX and TX will operate in 5V. Therefore do not try to flash any kind of 3.3V ESP8266 device using Arduino UNO. It will blow up the ESP8266 due to high voltage. This method can be used only with certain type of Sonoff devices with very specific configurations. Below type of Sonoff devices have been tested successfully with Arduino UNO for flashing the custom firmware without any issue.
Do not try to flash new rage of Sonoff DIY devices using this method (for example Sonoff Mini should not be flashed using this method. It will blowup the chip on Sonoff). Other R3 devices are not yet tested with this method.
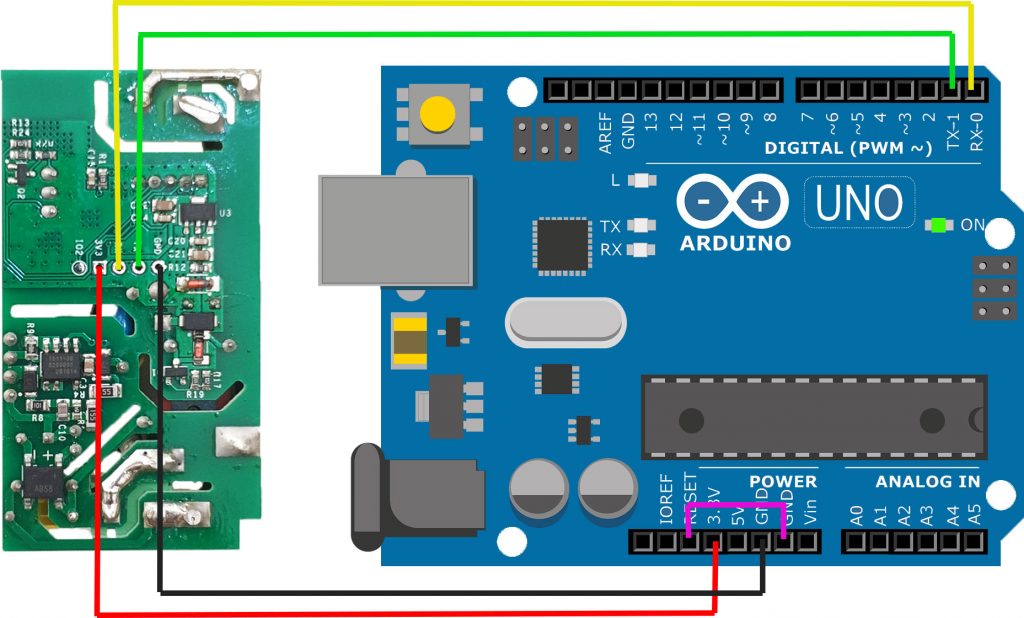
Do not connect the Sonoff to AC current during the flashing! This will blow up your computer, Arduino and also will kill you.
First connect RESET pin to GND on Arduino Board.
Connect 3.3V on Arduino to 3V3 on Sonoff.
Connect GND to GND on Arduino and Sonoff.
Connect TX to TX and RX to RX of the two boards
Before connecting the Arduino board to PC, make sure GPIO0 of Sonoff is connected to GND. This is required to put the Sonoff to flashing mode. In most cases, this can be archived by press and holding the button on Sonoff board when connecting to PC. Therefore, simply press and hold the button on Sonoff board and then connect the Arduino board to PC to get the Sonoff to flashing mode.
Connecting RESET pin to GND on Arduino board deactivates the Atmel chip. Therefore, there is no need to upload any sketch to Arduino to perform this task. In this case it is only the circuit on Arduino board is used and Atmel chip is not used at all.
Once the Arduino UNO board is connected to PC the flashing can be started. RX and TX indicators on Arduino board will start to blink during the successful flashing process.
Most popular custom firmware for Sonoff or ESP8266 based board are Tasmota, ESPurna and ESPEasy. Please download the firmware file from the respective website. In this guide Tasmota will be used. Tasmota is a widely used MQTT compatible firmware with many additional features than eWeLink.
Press and hold the button (or connect GPIO0 to GND in a different way on Sonoff board), then connect the Arduino board to PC via USB. Release the button after few seconds of connecting to PC.
In ESPEasy-mega find FlashESP8266.exe in dist folder. Open the application. Now copy the tasmota.bin file to the same folder as FlashESP8266.exe
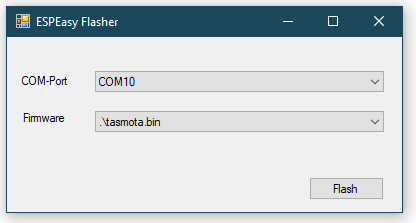
Select the COM Port and the tasmota.bin file and click Flash. After successful flashing, remove and reconnect the USB cable to PC to restart the Sonoff.
Now open Termite.
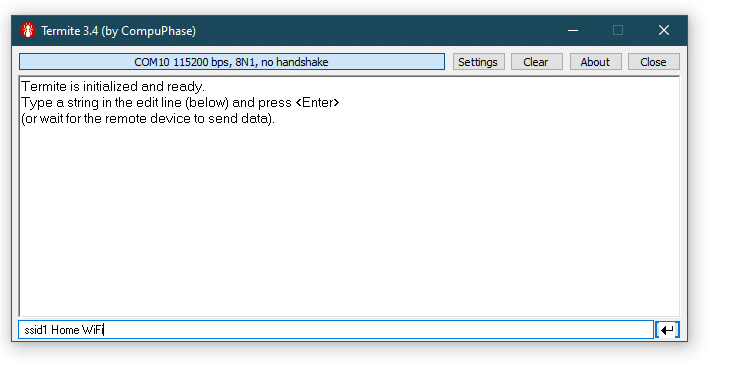
First setup the Wi-Fi configuration. Enter your Wi-Fi SSID as below to termite command line and press enter.
ssid1 <your Wi-Fi SSID>Then set the password for your Wi-Fi SSID
password1 <Wi-Fi password>Sonoff will restart and connect to your Wi-Fi network and the IP address will be displayed on Termite console screen.
Enter the IP Address on your browser to connect to your new Sonoff with Tasmota firmware.
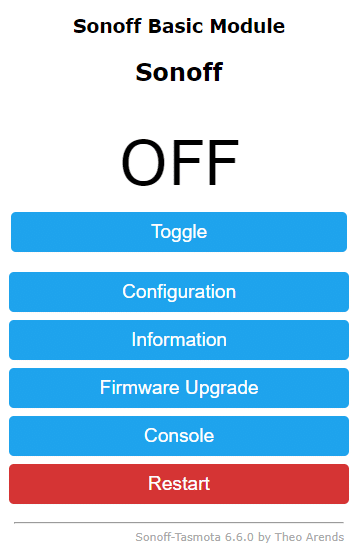
Now select Configuration, Configure Module and select the correct Module Type.
Then remove the USB and the Sonoff is now ready to be connected to AC current!
i want to upload my code so is there is any way to upload code in sonoff with arduino uno
Yes you can. First, you need to compile it. Can use Arduino IDE for that. Sonoff is ESP8266.